
How to Get the Most Out of Your Shoot
by Martin Bentsen, Actor Marketing Consultant
(Martin has been featured in Casting Networks, NYU Tisch, The Actor's Green Room, and more)
Please read this before your shoot to prepare properly.
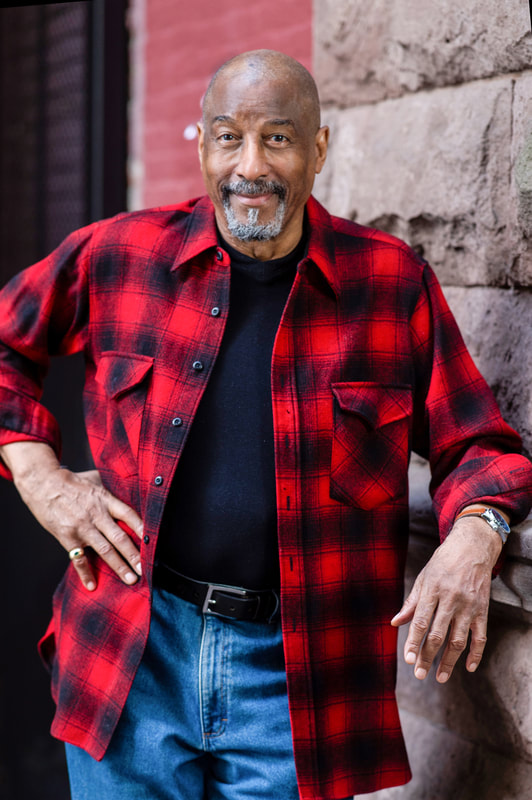
Type 1: Blue Collar Worker
|
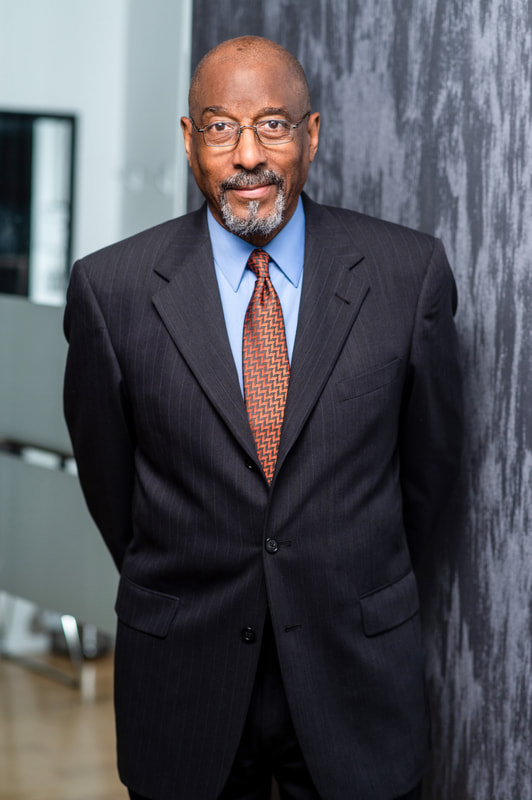
Type 2: CEO
|
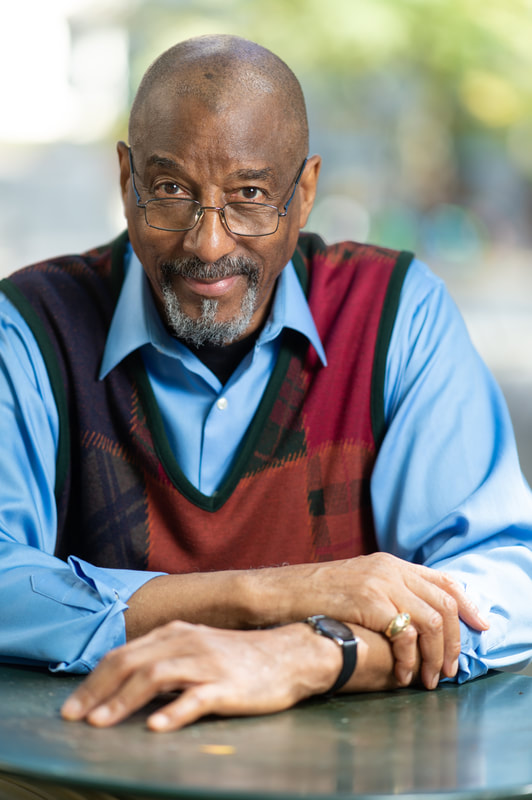
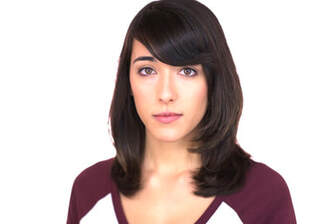
Type 3: Professor
|
Capturing a headshot that gets more auditions requires specificity.
The first step is to get clear on your goals (i.e. why are you updating your headshots?) and then start to build your plan.
Step 1: Figure Out Your Headshot Goals
Too many actors jump into their headshot session blindly, thinking that updated shots will automatically get them more auditions. This is a mistake.
A nice-looking headshot won't be effective unless it fits perfectly within your long-term plan. Do you want theater or film auditions? Do you want to audition for commercials? Or are you looking for an agent or manager?
Ideally, you should pick one primary goal for each look you're doing.
A nice-looking headshot won't be effective unless it fits perfectly within your long-term plan. Do you want theater or film auditions? Do you want to audition for commercials? Or are you looking for an agent or manager?
Ideally, you should pick one primary goal for each look you're doing.
ACTION STEP #1: Are you doing your headshots to find representation or to get more auditions? If more auditions, take a few minutes to come up with 3-4 television or theatrical shows you'd like to audition for within the next 3-6 months. Write down the show names. Keep in mind that targeting specific shows does not mean you won't be able to do anything else – it simply means you'll be more focused and have a higher chance of getting auditions for those shows.
Step 2: Get Clear on Your Type(s)
Note: we can help you figure out Types during the shoot if you're not sure.
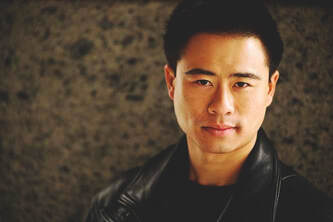
A very specific headshot (he looks like he can play "Asian gang member" roles, which is what he was going for in this photo)
|
A generalized, non-specific headshot (her expression, clothing, and backdrop give us no information about the type of characters she can play)
|
Casting directors rarely select actors for auditions who don't look specifically like the character they're casting for. This means it's very hard to get called in for roles when using a generic headshot (think white background, generic shirt, etc.). Generic shots only work for commercial auditions (if you've got a big smile).
That said, many actors worry about pigeonholing themselves into one particular Type (especially if they don't enjoy that Type). While that's a valid concern, there are three important factors to keep in mind:
- When you're first starting out, the world doesn't "owe" anything to you. We all have to "pay our dues" by doing things we don't necessarily love at the very beginning of our careers. As they say, you have to "give" before you can "gain," so picking a particular Type the industry sees you as – even if it's not something you truly love yet – is your way of giving back first. You'll eventually build up enough credibility (and credits) that you can break out of that Type if you so choose in the future.
- It's possible to start enjoying certain Types that you initially thought you wouldn't enjoy. There are ways to love playing characters you might not want to play – particularly if you do the homework of giving the character more "depth." Why is it that they're like that? Maybe the character isn't just a mean or horrible person, but the world somehow forced them into being that way against their will, and now they have to be like that. If you can come up with a creative backstory, you can easily empathize with the character type to start enjoying it more.
- If you're still against the idea of "Type," it might be possible to expand your range. In order to avoid shooting generic headshots that don't capture a particular Type, but still give you some range, you should consider doing a few different "looks" for your shoot. Capturing multiple different "Type" shots that are each specific will allow you to submit to a wider variety of auditions, but you'll just use a different headshot each time you submit (whichever is most right for the character you're submitting for at the time). To learn more about expanding your range, read this.
It's important to be specific with your Types BEFORE the shoot so you bring in the right clothing and can discuss with your photographer what you're needing.
ACTION STEP #2: Figure out 3-4 Types you can play. Ideally those Types should be realistically castable in the shows you listed from Action Step #1 (i.e. don't select "Psychotic Murderer" if you want to be in Hallmark Films). The more specific you are with your Types, the easier it will be to get lots of auditions with your new headshots. Not how to find your Type? Click here and we'll send you our complete Types list + instructions to find yours in just 10 minutes.
ACTION STEP #3: Decide which Types you want to specifically capture in your headshots. In general, it's best to make this decision by guesstimating on three factors: 1) What you'll probably have the most opportunities for, 2) What you'll have the least competition for, and 3) What you'll most enjoy playing. NOTE: I personally recommend giving more weight to numbers 2 & 3.
Need more guidance with this step? Martin Bentsen offers a deep dive Brand/Type Consultation via Zoom, where he'll personally help you figure out what Types to focus on, plus how to best capture them in your headshots (including exact colors and clothing styles to wear, expressions to focus on, etc.). Cost is $195. Email us to inquire.
Step 3: Decide on Your Clothing
Note: You can bring some different options to the shoot and we'll help you choose.
|
Once you've figured out your Types, it gets really easy to figure out what to wear. There are some standard rules of what works and what doesn't on camera, but in general you should aim to wear clothing styles that your particular Types would wear.
You can also take into consideration how those Types dress on the specific shows you listed in Action Step #1. Check out our in-depth "What to Wear for Actor Headshots" guide to learn all about what works best on camera, and remember that you can bring some different clothing options into your shoot if you're not fully sure of what to wear yet. ACTION STEP #4: Decide on outfits for each Type/look you'll be targeting in your shoot. A simple way to figure this out is by using Google Image Search. Type your character Types one by one PLUS the name of the show in quotes right next to it (example: [professor "Law & Order"] OR [detective "Narcos"]). Google will show you examples of people who look like your Type(s) and are from that show. This process will give you the perfect idea of the kind of clothing to wear for your headshots. Then compare that clothing against our what to wear article to be sure it doesn't break any rules. You can modify it slightly as necessary. |
Step 4: Decide on Your Expressions
Note: We'll help you with this by providing in-depth coaching & direction during the shoot!
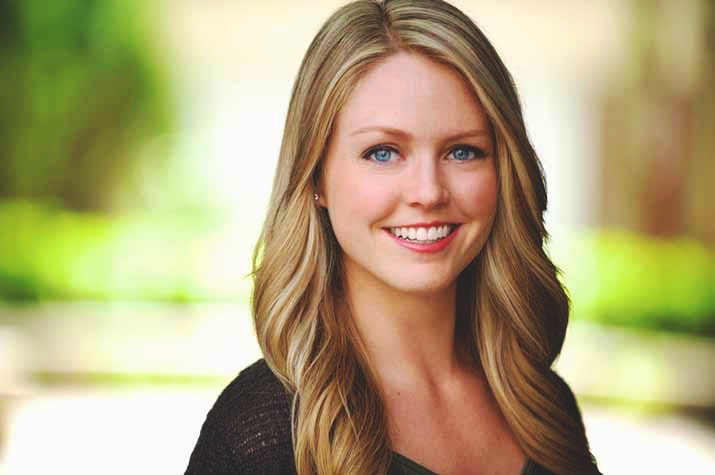
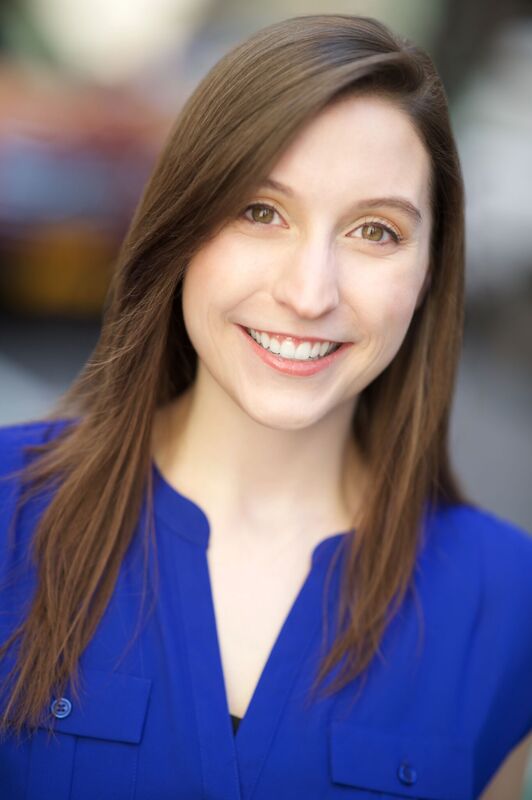
A big friendly smile.
|
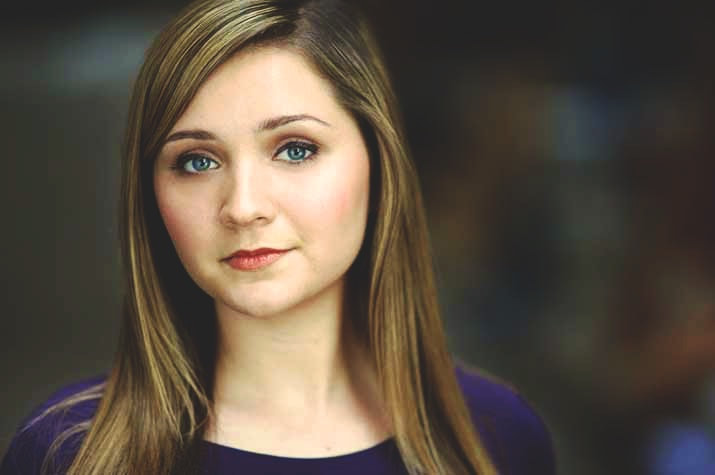
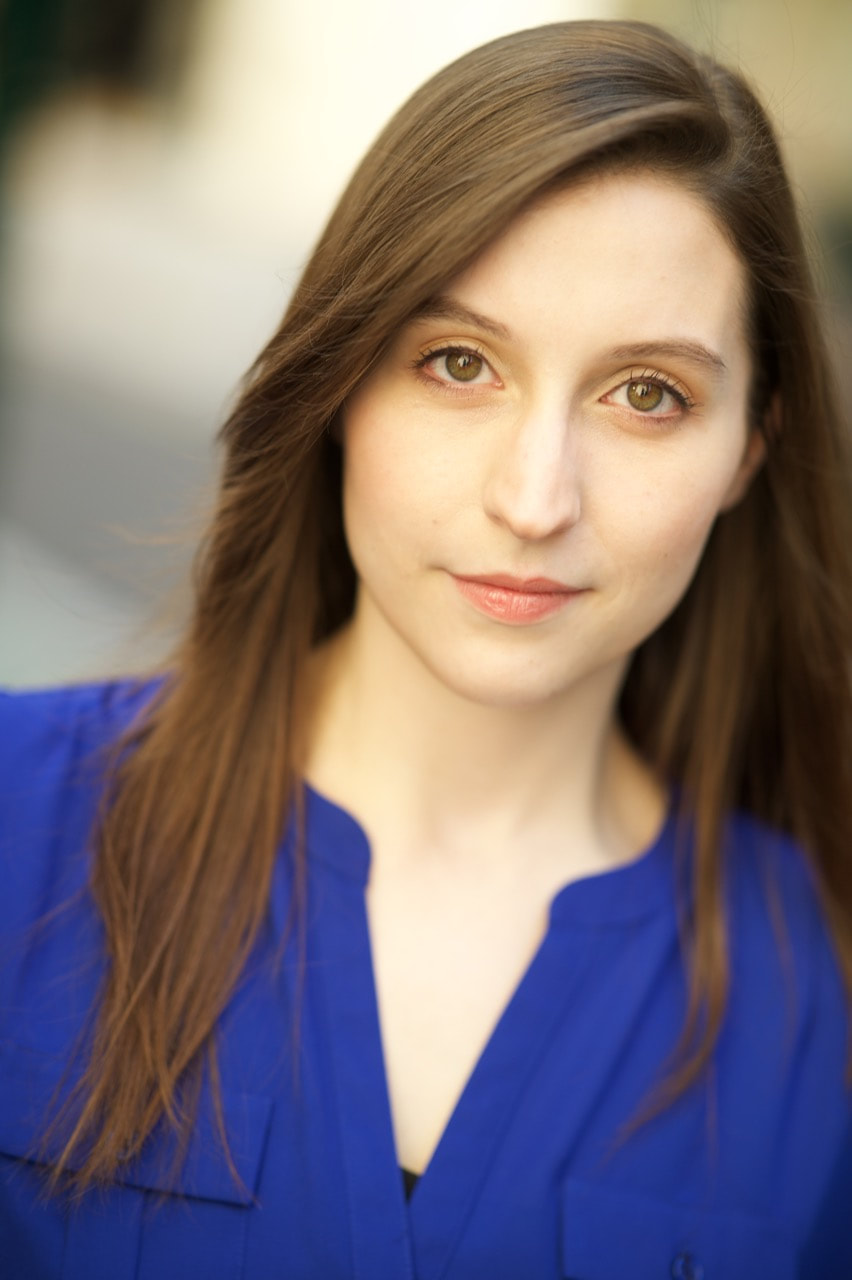
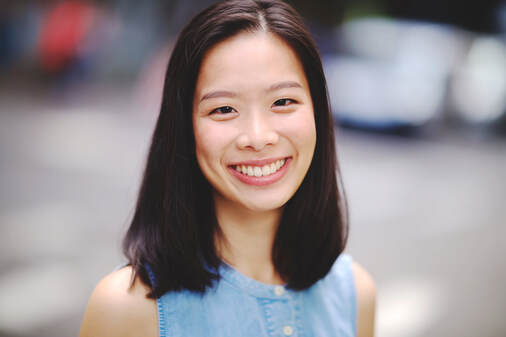
A slightly curious expression.
|
Being specific with your Types goes all the way from the macro (clothing/background/general aesthetic of the photo) all the way down to the micro (expression and internal emotion). There's a reason our tagline is "It's All About Expression."
At the end of the day, you could have an amazing, hyper-specific Type headshot, but if your expression looks off, a casting director will either get confused or simply think you're not a good actor – meaning they'll never give you a chance to audition or submit a self-tape.
To decide on expressions for your shots, simply think about the thoughts that would be going through your character's head. For instance, if you're focused on the Young Mom Type, what are some different thoughts she might be thinking? Perhaps "I'm so proud of you, son!" which would result in a nice smile, or "Why is every day so stressful for me?" which would result in a more serious, somber expression.
You should aim to capture a few different expressions for each look, so consider coming up with at least 3-4 thoughts for each character Type you plan to shoot (one Type per look, generally speaking).
ACTION STEP 5: Come up with at least 3-4 thoughts for each character Type you plan to shoot. Remember that if you decide to book with us, we'll help guide you during the shoot to capture a series of extremely specific expressions that will highlight the Types you're planning on, so you can feel free to skip this step if you want.
Step 5: Do the Shoot!
We hope to have the opportunity to work with you!
If you want to learn a bit more about what to bring to the shoot, how to feel confident going in, etc., you might consider reading our guide called How to Prepare for a Headshot Session.
But once you're there, if you want to know what happens in the studio, feel free to read on...
If you want to learn a bit more about what to bring to the shoot, how to feel confident going in, etc., you might consider reading our guide called How to Prepare for a Headshot Session.
But once you're there, if you want to know what happens in the studio, feel free to read on...
The Headshot Process
To capture effective headshots, we've created a unique process that's broken into three stages:
Our shoots are fun, relaxing, and easy! Here's a video that shows you what our process is like (especially for people who normally DON'T like having photos taken):
- Arrival, Consultation, and Set-Up
- The Shoot
- Post-Production
Our shoots are fun, relaxing, and easy! Here's a video that shows you what our process is like (especially for people who normally DON'T like having photos taken):
|
Ashley Davis - landed her dream job after that shoot. "A few months after we did our photoshoot and brand consultation, I landed my dream job! We talked about focusing my brand on comedy and with my new headshots, I ran with it. I now work at Shadowbox Live in Columbus, Ohio. It’s steady work where I sing rock n' roll and act in sketch comedies. It’s an open ended contract so ironically, your headshots were so good that I never had to use them again because I found my professional home. Thanks, City Headshots!" |
Part 1: Arrival, Consultation, and Set-Up
- What are your goals? When you first get in, we'll give you a few minutes to relax as we discuss your goals for the shoot. Are you trying to get more auditions? Looking for an agent? What kinds of projects do you want to perform in? As you hang up your clothing on the rack, we'll chat with you about any notes you prepped before the shoot.
- How are you on camera? We also want to get a feel of how comfortable and relaxed you are on camera because it dictates how we'll direct you during the session. What level of comfort do you have in front of the camera? Are there particular angles you dislike, or things you worry about when having pictures taken? Knowing these things will help us establish a baseline so we can make sure you get shots you're happy with.
- Next, we'll figure out how we want to start the session. We’ll talk about your Type(s), clothing, skin tone, hair, and eye color so we can ensure the background and lighting style we use works well for both the way you look AND the Type(s) you're going for.
- Once we’ve determined all that, we’ll then focus on specific things with your body. As we set things up, we'll be taking into consideration things like your height, shoulder width, neck length, hairline/style, and how your clothing fits (among other things) to determine body positions and angles that will be most flattering (while still ensuring you look like yourself).
- Finally, we’ll focus on the subtle (but important) details. These include whether your eyes are slightly different sizes or shapes (most people's are, so don't worry!), the angle of your nose, the prominence of your eyebrows, and what level of mouth tension you naturally have. These are just a few of the things that help us determine the angle the light should be hitting your face so you look like "you on your best day."
Note: If you’ve added makeup to your package, upon arrival at the studio you’ll also consult with our make-up artist and stylist about the look(s) you're going for, and they will be doing your makeup as our photographer sets up the equipment.
Part 2: The Shoot
- We'll let you see the preliminary test shot. After we've set everything up, we'll do a few quick test shots to ensure the lighting, background, and makeup looks good and works for whatever Type we're currently focused on. When we're happy with the setup, we'll let you see a test shot. Since we all see ourselves differently, we want to be sure you’re happy with the overall look of the photo before we begin the actual shoot.
- Almost anything you're unsatisfied with with (ex. "my eyes look too small" or "my smile is uneven") can be easily adjusted in-camera, while a few things might need to wait for digital retouching afterwards. As mentioned earlier, we recommend against changing the way you look too much, but are always happy to make adjustments if you need us to.
- No matter how ridiculous you might think your request is, we’re always happy to help. We would rather you be as nit-picky as possible during your shoot so you get exactly what you want and don't need a refund or reshoot!
- After you approve the test shot, the actual session will begin. We'll begin shooting, making sure your poses and expressions match the Type(s) you're going for. We'll get a range of expressions for each look, aiming to capture both your Type(s) AND your own personality.
- Partway through the shoot, we'll do outfit changes. If you have chosen a session with multiple looks, we will switch up your outfit and backdrops and repeat the process for your second/third looks.
- As we get ready to complete each look, we'll check in with you. Once we feel like we have a wide range of usable shots, we'll check in to see if there is anything you feel we missed. We'll scroll through the images for you just to check in, and as long as you approve we'll either move to the next look or, if we're done, close out the shoot. At that point, you'll be able to place any final remaining balance payment and you’ll be all set!
Our goal is to make your shoot super fun, easy, painless, and quick. Most shoots last about 20-30 minutes per look/outfit and the pre-shoot consultation usually takes about 5-10 minutes.
Even if you hate having photos taken, we promise to make the process fun and enjoyable so you walk away with a set of headshots you love.
Part 3: Post Production
- Your images will be sent to you same-day. You'll receive an email before 7pm that evening with a link to your high-res image files without watermarks. The only shots we won't send you are those that are deleted (blurry, blinking, or test shots that are unusable).
- Finally, you'll choose your favorite image(s) to be retouched. We'll suggest our favorite photos, and then you can submit your final selections for retouching to us here. The finalized, retouched images will be sent back in 2-3 business days. If you need 24-hour turnaround, that can be arranged for a $30 additional fee, and we just ask that you let us know as quickly as possible.
At that point, you're done! You'll have your finalized, high-res images and be ready to start using them to get more auditions.
If you have any questions or need anything from us at all, feel free to reach us at [email protected] or (212) 706-1902.